Wednesday, March 7, 2012

Oatmeal Bread


Oatmeal Bread

This recipe has reached near-legendary status around my family. Brothers and brothers-in-law weep with joy when I come visit because they know I will make them some oatmeal bread. Their wives call me on the phone the night before Thanksgiving, begging me for this recipe.  Sometimes when I go visit my family,  I even take my vintage Bosch mixer along with me because it can handle a big double batch of dough (a word of warning: most Kitchen Aids can't do double batches of this bread. It can handle the single batch just fine, though). This recipe is a staple in the kitchen at The Happy House, an old and cherished friend and the work-horse of our baked goods.  

Enjoy!

M. 

Single Batch: (makes 2 med. loaves or 1 1/2 dozen rolls)
2 c. boiling water
1 c. old fashioned rolled oats
3 T. oil
2 tsp. salt
2/3 c. brown sugar (or scant 1/2 c. honey)
1 T. yeast
1/3 c. water
5 - 5 1/2 cups flour
2 T. or so oil for large bowl


Double Batch: (makes 4 large loaves or 4 dozen rolls)
5 c. boiling water
2 1/2 c. old fashioned rolled oats
1/2 c. oil
1 1/2 T. salt
1 1/4 c. brown sugar (or 1 c. honey)
3 T. yeast
1 c. warm water
12-14 cups flour
2 T. or so oil for large bowl

Directions

Put oats, salt, oil, and sweetener in mixing bowl. 


Don't use quick cooking! I've tried and the texture of the final product isn't the same.

Real Salt is where it's at, baby!

Extra virgin organic coconut oil - yum!

Opted for local organic Tupelo honey this time around.


Pour boiling water over oats, oil, salt,  and brown sugar; stir.


Let the mixture stand until it comes to room temperature.


 When cool, dissolve yeast in 1 c. water and let proof.


Like magic, 10-15 minutes later.

Add yeast mixture to oat mixture + 1/2 of the flour; mix well.


Add in rest of flour until dough pulls away from sides of mixing bowl.  Knead for eight minutes. Go fold a load of laundry - that's just about the right amount of time for it to finish up. Don't scrimp on the time for this step, though. Kneading is important to the formation of gluten, the stuff that gives yeast breads their familiar loft and spring.


Place dough in large bowl that has been coated with oil; turn once. I love these food-grade polycarbonate containers with the snap-on lids (this one is made by NSF). Most restaurant supply stores will have them - I got mine online but I don't remember where! It makes it SO much easier to figure out if the dough has doubled during it's rising time. So. much. easier.


Place the dough somewhere warm and let it rise until doubled. (See how handy those marks are on the side? I also use these bins when I make 5-Minute Artisan Bread). 


After dough has doubled,  shape into what ever shape makes your skirt fly up. Place into greased pans (or on a Silpat mat). Today,  I did three loaves of sandwich bread and 8 hamburger buns (burgers for dinner tonight - the boys are happy about that one).  Depending on the menu for the week,  I might do two loaves and the rest dinner rolls or sometimes hot dog buns or garlic knots. This dough is pretty darn flexible like that.


Cover dough with a kitchen towel and then let rise until doubled in size, yet again.  Wouldn't you agree there are few things lovelier in the kitchen than a perfectly formed loaf of bread?


Bake the rolls/buns at 375 degrees for 20-25 minutes. 


Look at all that oatmeal-y goodness!


Piles of perfection, just in time for dinner.

Bake the bread at 350 degrees for 30-40 minutes. 


Cool on a wire wrack. Brush with melted butter if you are in the mood.  (In my house, when the bread comes out of the oven, I also have to hide anything that can be pushed, shoved, or toted to the counter where it is cooling. Otherwise, little Princess P. will take a couple of bites out the end of each loaf when Mom isn't looking.)


Monday, March 5, 2012

Skillet Rosemary Chicken


Pinspired by this recipe from Minimally Invasive, I made the above for dinner last night. Mind you, when I went to make it, I didn't have mushrooms (which is OK since the kids wouldn't have eaten them any way), I didn't have any red potatoes but I did have some Yukon Golds that needed to be eaten STAT, and I added a bunch of thyme, simply because it was in the pot next to my rosemary out on the pool deck and it said to me, "Add some of me to that rosemary and Meyer lemon in your skillet and it will be a party in your mouth!" (And it was.) I also cut a huge onion into  1/8ths and sauteed that after pulling the chicken out.

So at this point, I don't know if it can still be considered the same recipe since I changed four different ingredients but isn't that the point of being inspired? Taking something and making it your own?

Anyhooo, the kids gobbled it up, even my very picky seven-year old. He even ate the onions!


But the real star of the show? The Meyer lemons!!!


After finishing the dish off in the oven, the lemons were so soft and succulent, holy cow. I wasn't planning on eating the whole darn lemon, but I thought, "Hey...I wonder if that is any good?" After discovering the joys of preserved lemons, I am willing to be adventurous and try a roasted one, too. So I cautiously sliced off a bit and tasted it.

And let me just say, a bit of potato, chicken, onion and a sliver of roasted lemon peel is a party in your mouth.  Roasting the lemon peels made them tender and removed the bitter taste normally found in the pith (I don't know how, but I think I need to do some research to find out the science behind that one).

This recipe is definitely going into regular rotation here at the Happy House. Next time, I might even follow the directions a bit more closely.


Sunday, March 4, 2012

Meyer Lemon Bars


Dear Ina,

When I get stressed, I bake. And yesterday with the tornado warnings and swirling winds, I was stressed. I needed something that would jolt me out of the strange grey-green day we were having, something that would chase away the dark rain that was starting to leak through the ceiling (which happens sometimes when it rains sideways for hours on end).   I had some Meyer lemons left over from our last co-op delivery and I searched Pinterest for some ideas on what I could make out of them.

Your lemon bars fit the bill exactly. Can you believe the color of these things? And they taste just as gorgeous as they look!  If I wasn't convinced quality ingredients make a difference, I am now. The intense flavor of local organic Meyer Lemons and the deep yellow of the egg yolks from the happy hens at Walters have turned a nice desert into an electric masterpiece.

Sincerely,

A devoted and delighted follower

_______________________

Please visit http://www.foodnetwork.com/recipes/ina-garten/lemon-bars-recipe/index.html for the full recipe.

Friday, March 2, 2012

Happy Birthday Dr. Suess


Green eggs for Dr. Suess's 108th birthday!!! Just use your favorite Deviled Egg recipe and add in some blue & green food coloring to the yolk mixture.

(We had ham for dinner as well, but I forgot to get a picture of it.)

Sunday, February 19, 2012

Preserved Meyer Lemons

Preserved Meyer Lemons
(AKA Pickled Lemons)


The Meyers lemons from the food co-op are gorgeous. I want to roll around in them like a little kid in the ball pit at Chuck-E-Cheeses (do they still have ball bits there? I haven't been since I was like 13 years old so I don't know if they do or not). 

At any rate, I have been making all things Meyer lemon. About six weeks ago, I made some preserved lemons to use in...well, just about everything it turns out. Traditionally they are used in Moroccan cooking, but I have discovered they are incredible in anything that needs a bit of a punch of lemony-goodness. Soups. Salads. Casseroles. Desserts. Fish. Poultry. Drinks (Thai lemonade, anyone?)

I just pull a few quarters out of the jar, rinse them well, slice, dice or mince them and away we go. My latest obsession is putting them in the tabbouleh salad I can't seem to eat enough of. I use Meyer Lemon Oil and Meyer Lemon juice to dress the salad and then I toss in preserved Meyer lemons and I am in lemon heaven.

From what I gather, preserved lemon are considered a condiment. I consider them one of the best ways to extend the lemon season throughout the year.

1. Scrub some lemons well. 


2. Slice them into quarters, being sure NOT to cut all the way through. You want them to be attached at the base, kind of like a flower.


3. Pack the lemons full of a good rock salt and place in shallow dish. I use an organic sea salt. I have used Real Salt in its rock form but the lemons don't end up very pretty at the end of the process. Tasty, but not very nice to look at. I use those in dishes where the lemon will be "hiding."


4. Cover with plastic wrap and let stand for about 24 hours. This helps to soften the rinds a bit and allows you to pack the lemons quite tightly into the jars.


5. The next day, pack as many lemons as you can into a sterilized jar. Pour in any juice that has collected in the bottom of the dish you set the lemons in.  Don't be shy about this step! No need to treat these little beauties with kid gloves. You want them to release as much juice as possible and to get real close to their neighbors there in the jar.  As you fill the jar, use rock salt to fill any spaces.  I can usually get 10-12 Meyer lemons in to one quart size jar.


6. Top off with more rock salt. No part of the lemon should be exposed to the air.


7. Top jar with an air tight lid and date it. These lovely little things have to sit around for 6 weeks before they are ready to enjoy. I tuck mine in a cupboard where I have some space for fermenting foods (BTW, if you haven't had homemade sauerkraut, then you are missing out on one of the great pleasures of life).  Periodically, I will take it out and shake it gently to make sure the juices and salt are reaching all the lemony bits in the jar.


8. After six weeks, enjoy a bit of preserved sunshine! Just pull out what you need and rinse them well. You can ditch the pulp if you want, but if you do use it, it really pumps up the lemon flavors in your dish. Pour a bit of olive oil on top of the ones left in the jar, then store in the fridge for up to 6 months.  Oh - and don't toss the liquid. It can be used for all sorts of things as well.


There are some people who use a water bath to preserve these even further.  I haven't tried that yet, mainly because I didn't know how good they were and I didn't wan to invest the time and effort to put up 24 pints of preserved lemons just to find out they were terrible. But they aren't terrible at all. They are terribly tasty!

So if you happen to find a couple of pounds of Meyer lemons that you aren't quite sure what to do with, try this out with them and see if you like them, too.


I tried slicing some up for a pint sized jar of them. I will let you now how they turn out. It isn't the traditional Moroccan way, but it might make it easier when I only need a little bit of the preserved lemon.


Friday, December 9, 2011

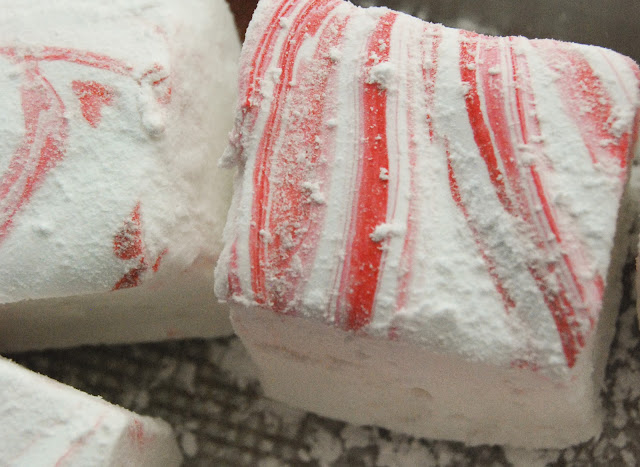
It's a Marshmallow World in the Winter

Inspired by this pin over on pinterest:


I did this: 


These little creatures are some of the most brilliant things. EVER. Now I just have to figure out where to hide them until the Christmas party tomorrow night! All my men folk will i.n.h.a.l.e. these if they get wind of them.

P.S. Making homemade marshmallows? Ridiculously easy. Like comical. And as always, way better than the stuff you buy in a bag.

P.P.S. Sara - this is SO not a GAPS compliant recipe. ;)

Tuesday, November 15, 2011

Hearty Chicken Stew with Pumpkin and Wild Rice

So I was over at Pinterest this morning and  came across a recipe for this:


It's official title is "Hearty Chicken Stew with Butternut Squash & Quinoa."

I didn't have any butternut, but I had some pie pumpkins. I didn't have any quinoa but I had some wild rice. And I didn't put any olives in it because...well, because my family just wouldn't eat kalamata olives. I would eat them, no problem, but the rest of the crew? Not so much.

Here's my version of the stew:


And the family gobbled it up, baby girl included.

Have I mentioned how much I love Pinterest?